Posted on

Smart Ways to Minimize Food Waste in Your Home

Tips on how to reduce food waste.

I was staring at a bag of wilted, expensive organic kale last Tuesday—the kind you buy when you’re feeling ambitious but end up too exhausted to actually cook—and I realized I wasn’t just throwing away produce; I was throwing away time and hard-earned money. Most “experts” will tell you that learning how to reduce food waste requires a complete lifestyle overhaul or a high-tech smart fridge that costs more than my first car. That’s nonsense. The truth is, most of the advice out there is just more unnecessary friction added to an already cluttered life.

I’m not here to sell you on a complicated composting ritual or a weekly five-hour meal prep marathon. Instead, I’m going to show you how to build a frictionless system that works with your actual schedule, not an idealized version of it. We’re going to focus on simple, repeatable automations—from smarter shopping habits to better storage logic—that cut the waste and reclaim your mental bandwidth. Let’s stop the bleed and get back to the utility of eating well without the guilt.

Table of Contents

Automating Meal Planning for Beginners

Automating Meal Planning for Beginners guide.

Most people approach meal planning like a chore, which is why they fail by Wednesday. If you’re looking into meal planning for beginners, stop trying to be a gourmet chef and start acting like an operations manager. You don’t need a complex cookbook; you need a repeatable system. I recommend starting with a “capsule pantry” approach—selecting five core ingredients that play well together and building your weekly rotation around them. This eliminates the decision fatigue that usually leads to impulse buys and, ultimately, spoiled produce.

To truly automate this, you need to sync your planning with your shopping. I use a simple digital checklist that mirrors my grocery store’s layout. By mapping out exactly what I need before I step foot in the aisle, I avoid the “aspirational shopping” trap—buying kale because I feel like being healthy, only to watch it turn into slime in the crisper drawer. Integrating these small, sustainable kitchen habits ensures that every item you pay for actually makes it to your plate. It’s about building a workflow that removes the guesswork and keeps your grocery expenses from creeping up.

Mastering Strategic Food Storage Techniques

Mastering Strategic Food Storage Techniques in refrigerators.

Most people treat their refrigerator like a black hole—items go in, they disappear, and eventually, they emerge as science experiments. If you want to stop throwing money in the trash, you need to stop treating storage as an afterthought and start treating it as a logistics problem. It’s about visibility and environment. I’ve found that the simplest fix is the “First In, First Out” (FIFO) method I used back in operations. When you get home from the store, move the older produce to the front of the shelf. If you can’t see it, you won’t eat it.

Beyond organization, you need to master specific food storage techniques to actually extend the life of your inventory. For instance, don’t just toss herbs in a plastic bag; treat them like a bouquet of flowers by placing them in a jar of water. Similarly, keep your onions and potatoes in separate dark spaces—storing them together actually accelerates spoilage. It’s a minor adjustment, but these small shifts in your sustainable kitchen habits create a massive ripple effect. By managing the micro-environment of your pantry and fridge, you aren’t just saving groceries; you’re reclaiming the mental bandwidth wasted on constant, unnecessary grocery runs.

Five Low-Friction Habits to Stop the Bleed

  • Audit your inventory before you shop. I keep a running list in my pocket notebook of what’s actually in my pantry and freezer. If you don’t know what you have, you’re just buying duplicates and letting old stock die in the back of the cupboard.
  • Implement a “First In, First Out” (FIFO) system. It sounds like corporate jargon, but it works. When you bring home new groceries, move the older items to the front of the shelf. Treat your fridge like a professional kitchen, not a junk drawer.
  • Use your freezer as a safety net. Almost anything can be frozen—bread, milk, even wilting herbs in olive oil. If you realize you won’t get to that spinach by Thursday, freeze it. Don’t wait for it to turn into a science experiment.
  • Stop over-buying “just in case.” We often buy extra because we’re anticipating a busy week that never happens. Buy for the reality of your schedule, not the fantasy of your ideal self. Stick to a strict list and ignore the impulse buys.
  • Master the “Eat Me First” bin. Designate one small container in your fridge for items that are nearing their expiration date. It creates a visual cue that removes the mental friction of deciding what to cook when you’re tired.

The Real Cost of Neglect

“Food waste isn’t just a failure of planning; it’s a leak in your personal economy. Every wilted vegetable in the back of your fridge is a small, unnecessary tax on your time and your wallet. Stop treating your kitchen like a graveyard for impulse buys and start treating it like an inventory system.”

Marcus Holloway

The Bottom Line

Reducing food waste: The Bottom Line.

Reducing food waste isn’t about achieving some impossible standard of perfection; it’s about building a system that works even when life gets messy. We’ve covered how to automate your meal planning so you aren’t making reactive, expensive decisions at the grocery store, and how to use strategic storage to extend the life of what you already own. When you combine these two—predictable planning with smart preservation—you stop the constant cycle of throwing money into the trash. It’s about removing the friction between your intention to eat well and the reality of your busy schedule.

At the end of the day, my goal isn’t just to help you save a few dollars on your grocery bill, though that is a significant win. It’s about reclaiming your mental bandwidth. Every time you avoid the “what’s for dinner?” panic or find a perfectly preserved vegetable in the crisper, you are winning back small pieces of your time and energy. Stop letting your kitchen run you. Implement these systems, simplify your routine, and focus your attention on the things that actually matter. Let’s get to work.

Frequently Asked Questions

How do I balance a structured meal plan with a schedule that constantly changes?

Stop trying to plan for perfection; your calendar isn’t going to cooperate. Instead, build a “modular” meal system. Instead of rigid recipes, prep a library of versatile components—roasted proteins, grains, and washed greens. If a meeting runs late, you grab a bowl and assemble. If you have time, you cook. You aren’t planning meals; you’re managing an inventory. This shifts the goal from following a schedule to maintaining readiness.

What are the most cost-effective tools for tracking what's actually in my pantry?

Don’t go buying a fancy, subscription-based smart pantry system. That’s just more friction and more monthly bills. If you want utility, stick to the basics. A simple shared Google Sheet or a dedicated Note in your phone is all you need to track quantities. If you prefer something tactile, a small whiteboard on the pantry door works wonders. The goal isn’t a high-tech gadget; it’s visibility. If you can see it, you won’t buy it twice.

How much time should I realistically spend on these systems each week to see a return?

Look, I’m not a fan of busywork. If these systems take more than 30 to 45 minutes of your week, you’ve built a burden, not a solution. Spend twenty minutes on a Sunday mapping your meals and fifteen minutes checking your inventory. That’s it. The goal is to front-load a tiny bit of mental effort to prevent hours of decision fatigue and wasted cash later. If it feels like a chore, simplify it.

Which high-impact food items am I likely wasting the most without realizing it?

If you’re looking at your trash can and seeing lost profit, look for these three culprits. First, leafy greens; they wilt faster than a bad business deal. Second, soft fruits like berries—they’re high-maintenance and high-cost. Finally, look at your dairy and deli meats. We often treat expiration dates like hard deadlines when they’re actually just suggestions, leading us to toss perfectly good inventory. Stop the bleed by tracking these high-turnover items specifically.

Posted on

Quick and Easy Treats for Your Sudden Sweet Cravings

Quick and easy dessert recipes for cravings.

I’ve spent most of my career optimizing workflows and stripping away inefficiency, but I used to treat my kitchen like a second office. I’d see a recipe that looked delicious, only to realize it required twelve specialized tools and three hours of standing over a stove. That’s not cooking; that’s a project management nightmare. When you’re hosting friends or just winding down after a long day, the last thing you need is a sink full of dishes and a sense of exhaustion. You want something sweet, but you don’t want the friction. That’s why I’ve curated this list of easy dessert recipes that prioritize high impact with minimal overhead.

In the following eight entries, I’m cutting through the culinary noise to give you recipes that actually work for a busy lifestyle. We aren’t looking for complicated pastry techniques or hard-to-find ingredients here. Instead, I’ll show you how to leverage a few smart shortcuts to produce results that taste like you actually tried. By the end of this, you’ll have a toolkit of reliable, low-effort sweets that allow you to spend less time prepping and more time actually enjoying your evening.

Table of Contents

The Three-Ingredient Affogato

The Three-Ingredient Affogato with espresso and gelato.

When I’m hosting a small group and don’t want to spend an hour in the kitchen, I turn to the affogato. It is the ultimate example of minimalist engineering: high-quality vanilla bean gelato, a shot of hot espresso, and perhaps a few shaved chocolate curls. There is no baking involved, which means zero cleanup and zero chance of a culinary disaster.

Salted Dark Chocolate Bark

Homemade Salted Dark Chocolate Bark with almonds.

I’ve always appreciated things that can be made in bulk and stored for later. Making dark chocolate bark is essentially a low-friction way to have a premium snack on hand. You simply melt high-quality dark chocolate, spread it thin on parchment paper, and sprinkle it with sea salt and crushed almonds or dried fruit before it sets.

Skillet Berry Crumble

Warm Skillet Berry Crumble in cast iron.

If you want something that feels warm and comforting without the complexity of a layered cake, go with a fruit crumble. I prefer using a single cast-iron skillet because it simplifies the process and looks great on the table. Toss some frozen berries with a bit of sugar and cornstarch, then top them with a simple oat mixture.

Classic Macerated Berries

Sometimes, the best way to handle a sweet craving is to stop overthinking it. Macerated berries are my go-to when I want something light that won’t leave me feeling sluggish. You take whatever fresh fruit is in season—strawberries, blueberries, or raspberries—and toss them with a spoonful of sugar and a splash of balsamic vinegar or lemon juice.

No-Bake Peanut Butter Bars

I have a soft spot for recipes that bypass the oven entirely. These peanut butter bars are a masterclass in resource management. You mix melted butter, sugar, peanut butter, and graham cracker crumbs until it reaches a workable consistency, press it into a pan, and let it set. It’s predictable, reliable, and consistently delicious.

Warm Cinnamon Apples

We often think of dessert as something that requires a specialized pantry, but a warm apple dish proves otherwise. Slicing up a few crisp apples and sautéing them with butter, cinnamon, and a touch of honey is a low-overhead operation. It smells incredible and requires almost zero mental bandwidth to execute.

Whipped Ricotta with Honey

If you want to impress someone without actually “cooking,” this is your best move. High-quality ricotta cheese, when whipped with a whisk or a hand mixer, takes on a light, airy texture that feels incredibly luxurious. It’s a sophisticated pivot from the standard heavy creams used in most desserts.

Frozen Yogurt Bark

During the warmer months, I find myself gravitating toward things that are refreshing rather than heavy. Frozen yogurt bark is essentially an automated snack. You spread Greek yogurt on a baking sheet, press in some pomegranate seeds or sliced almonds, and freeze it. It’s a way to turn a healthy staple into something that feels like a treat.

The Philosophy of the Simple Sweet

“A dessert shouldn’t be another item on your to-do list; it should be the reward at the end of it. If you’re spending three hours in the kitchen for a single plate of cookies, you’ve lost the plot. Aim for high-impact flavor with low-friction execution—because the goal is to eat, not to manage a crisis.”

Marcus Holloway

Cutting the Complexity

At the end of the day, dessert shouldn’t feel like a second job or a complicated logistics problem. Whether you’re opting for the three-ingredient affogato or a quick tray of salted chocolate brownies, the goal remains the same: high impact with minimal friction. You don’t need a pastry chef’s degree or a kitchen full of specialized gadgets to serve something memorable. By focusing on quality ingredients and streamlined methods, you’ve successfully removed the unnecessary fluff from your post-dinner routine. The point isn’t to master culinary art; it’s to automate the sweet stuff so you can spend less time cleaning flour off the counter and more time actually enjoying the moment.

I’ve spent a lot of my career looking for ways to optimize workflows, and I’ve learned that the same principle applies to your personal life. We often overcomplicate things because we think “effort” is synonymous with “value,” but that’s a fallacy. True efficiency is about finding that sweet spot where the reward outweighs the labor. Use these recipes as your baseline, then tweak them as you see fit. Don’t let the pursuit of perfection become a barrier to enjoyment. My advice? Pick one, make it tonight, and reclaim your evening. Life is too short for complicated dishes that leave you too tired to enjoy them.

Frequently Asked Questions

Can I prep any of these ahead of time to save more time during the week?

Absolutely. If you aren’t prepping, you’re just creating more work for yourself later. For the fruit-based options, chop everything and store it in airtight containers; it keeps the moisture in and the mess down. For anything involving chocolate or nuts, toast the nuts ahead of time—it deepens the flavor and saves you a step when you’re actually hungry. Don’t wait until the moment of craving to start the prep. Efficiency is everything.

What are the best store-bought shortcuts that won't ruin the quality?

Look, I’m not interested in culinary purism; I’m interested in efficiency. If you want to save time without sacrificing the end result, buy high-quality frozen puff pastry and pre-made shortbread crusts. They’re consistent and reliable. Also, don’t sleep on premium vanilla bean paste or high-end chocolate chunks. They do the heavy lifting for you. Use the shortcut to skip the prep, but spend your saved time on the ingredients that actually define the flavor.

How do I scale these down if I'm just cooking for one or two people?

Scaling down shouldn’t feel like a math exam. If you’re cooking for one or two, stop trying to force a full batch into a tiny ramekin. Most of these recipes work best if you halve the ingredients and use smaller vessels—like a mini cocotte or a small oven-safe dish. For the leftovers, don’t overthink it: freeze half the batter or fruit base immediately. It saves you the effort of a second bake later.

Which of these options are actually decent if I'm trying to watch my sugar intake?

If you’re watching your sugar, skip the heavy hitters. Focus on the fruit-based options or anything utilizing dark chocolate—the higher cocoa content means less sugar and more actual flavor. I usually lean toward the berries or the nut-based treats; they provide satiety without the inevitable glucose spike and crash. It’s about finding that balance where you satisfy the craving without sabotaging your focus for the rest of the afternoon. Keep it simple.

Posted on

The Foolproof Method for Perfect Rice Every Time

Learn how to cook rice perfectly.

I spent most of my twenties in corporate boardrooms where everything was measured in spreadsheets and optimized to the second, but nothing ever frustrated me quite like the sheer amount of nonsense surrounding basic kitchen tasks. I’ve seen people waste money on high-tech gadgets and spend twenty minutes reading “expert” blogs just to figure out how to cook rice perfectly, only to end up with a pot of gummy, overcooked mush. It’s a classic example of unnecessary friction—taking a simple, fundamental process and making it a source of unproductive stress.

I’m not here to sell you a specialized ceramic cooker or a complex series of timed measurements that require a stopwatch. My goal is to give you a streamlined, repeatable system that works every single time, whether you’re cooking for one or prepping for a week. I’m going to strip away the culinary fluff and give you the no-nonsense mechanics of water ratios and heat control. By the end of this, you’ll have a reliable method that saves you time and mental bandwidth, letting you get back to what actually matters.

Table of Contents

Mastering the Precise Rice to Water Ratio

Mastering the Precise Rice to Water Ratio

Look, I’ve seen too many people treat cooking like a high-stakes chemistry experiment when it doesn’t need to be. If you want to stop the cycle of guessing, you need to master the rice to water ratio once and for all. For standard long-grain white rice, the golden rule is simple: one part rice to two parts water. If you’re using a rice cooker, check your manual for specific rice cooker settings, but generally, that 1:2 baseline is your safest bet for consistency.

The real secret to avoiding mushy rice isn’t just the liquid; it’s what you do before the heat even touches the pot. I always make a point of rinsing white rice under cold water until the liquid runs clear. You’re washing away the excess surface starch that turns your grains into a gummy, unappealing paste. It’s a thirty-second task that saves you twenty minutes of frustration later.

Once you’ve got your ratio and your rinse down, stick to the stovetop rice method for maximum control. Bring it to a boil, drop it to the lowest simmer, and cover it tight. Don’t peek. Every time you lift the lid, you lose heat and steam, throwing your timing off. Just let the physics do the work.

Rinsing White Rice to Eliminate Excess Starch

Rinsing White Rice to Eliminate Excess Starch

If you skip this step, you’re essentially asking for trouble. Most people think the starch on the surface of the grain is harmless, but it’s actually the primary culprit behind that gummy, clumping mess. When you don’t start with a clean grain, that surface starch gelatinizes during the boil, turning your meal into a heavy, unappealing paste. If you want to succeed in avoiding mushy rice, you have to treat rinsing as a non-negotiable part of the process.

Don’t go overboard with fancy gadgets here; just grab a fine-mesh strainer and some cold water. Put your rice in the strainer and run the water over it, using your hand to swish the grains around in a circular motion. You’ll see the water turn cloudy almost immediately. Keep going—rinse it until the water runs clear. It’s a simple, tactile task that takes maybe sixty seconds, but it’s the difference between a bowl of glue and distinct, fluffy grains. Think of it as clearing the static out of an analog signal; you’re just removing the noise so the actual quality of the grain can come through.

Three Rules and a Safety Net

  • Stop peeking. Every time you lift that lid to check on the progress, you’re letting out the steam and dropping the temperature. Let the physics do the work; leave the lid alone until the timer goes off.
  • Use a heavy-bottomed pot. Thin, cheap pans create hot spots that burn the bottom layer of rice while the top stays crunchy. You want even heat distribution, not a scorched mess.
  • The “Rest” is non-negotiable. Once the water is absorbed, turn off the heat and let the pot sit, covered, for at least ten minutes. This allows the moisture to redistribute so you don’t end up with a mushy exterior and a hard core.
  • Fluff, don’t stir. When you’re ready to serve, use a fork or a rice paddle to gently lift and aerate the grains. If you stir it vigorously like you’re mixing cement, you’ll break the grains and end up with a gummy paste.
  • Keep a “fail-safe” backup. If you’re cooking for a client or a dinner party and the stakes are high, use a rice cooker. It’s a single-purpose tool that eliminates the variables of stovetop cooking. It’s not cheating; it’s efficient.

The Philosophy of the Perfect Grain

“Cooking rice isn’t some culinary mystery to be solved; it’s a process of managing variables. Once you master the ratio and the rinse, you stop fighting the kitchen and start trusting the system.”

Marcus Holloway

Stop Overthinking the Grain

Stop Overthinking the Grain while cooking rice.

At the end of the day, cooking rice isn’t some complex chemistry experiment; it’s about reducing variables. You’ve got the ratio down, you’ve rinsed away the starch to prevent that gummy mess, and you know how to let the steam do the heavy lifting. Once you master these few foundational mechanics, you stop treating every meal like a high-stakes operation. You aren’t just making a side dish; you are automating a basic survival skill so that you can stop worrying about the stove and start focusing on the people sitting around your table.

I spent years in corporate roles where every minor detail felt like a crisis, but I’ve learned that the most efficient systems are often the simplest ones. Perfect rice is a small win, a tiny bit of friction removed from your daily routine. Don’t let the pursuit of perfection paralyze you—just apply the logic, trust the process, and get it done. Once you have this under control, you’ve reclaimed a little more mental bandwidth for the things that actually deserve your attention. Now, go eat.

Frequently Asked Questions

What if I’m using brown rice or another variety instead of white?

If you’re switching to brown rice, the rules change. Brown rice has a bran layer that requires more hydration and time to soften. Forget the 2:1 ratio; aim for 2.5 parts water to 1 part rice. Also, give it more time—usually 40 to 45 minutes rather than 15. It’s a bit more friction, but if you want that nutty texture without ending up with crunchy grains, stick to the extra water.

How do I know if the rice is actually done without checking it every two minutes?

Stop hovering over the pot. You aren’t a scientist, and constant checking only lets the heat escape. Instead, rely on two indicators: the visual and the tactile. Once the water is fully absorbed and you see small “steam vents” or craters forming on the surface, kill the heat. Then, let it sit, covered, for ten minutes. This resting period finishes the job without you lifting a finger. If it’s firm but not crunchy, it’s done.

My rice always comes out mushy or sticky—what am I doing wrong?

If your rice is a sticky mess, you’re likely overworking it or overwatering it. Most people make the mistake of stirring the pot—don’t. Once the water is in, leave it alone. If it’s consistently mushy, you’re probably using too much water or not rinsing enough to remove that surface starch. Stick to the ratio, rinse it until the water runs clear, and let the steam do the heavy lifting. Keep it simple.

Can I just use a rice cooker, or does that ruin the process?

Look, if you’re asking if a rice cooker “ruins” the process, you’re overthinking it. I’m all about reducing friction, and a rice cooker is a tool of pure utility. It handles the temperature fluctuations so you don’t have to. Just follow the same principles: rinse your rice first to get rid of that excess starch, then use the ratio we discussed. It’s not cheating; it’s automating the mundane. Use the machine. Get the results. Move on.

Posted on

Vegetarian Dishes That Even Meat Eaters Will Crave

Delicious easy vegetarian recipes for everyone.

I spent two decades in corporate operations, where I learned that the most expensive resource you own isn’t your money—it’s your decision fatigue. By the time most of us finish a workday, the mental bandwidth required to figure out a healthy dinner feels like an insurmountable task. We end up settling for overpriced takeout or processed snacks because the alternative feels too complex. I’ve found that the secret to maintaining a high-functioning life isn’t about radical lifestyle changes; it’s about finding easy vegetarian recipes that remove the friction from your evening routine without sacrificing nutrition.

I’m not here to give you a lecture on ethics or a list of ingredients you can’t find at a local grocer. Instead, I’ve curated eight specific, high-utility meals designed to get you fed and back to your life in minimal time. These aren’t just recipes; they are systems for survival in a busy world. We’re going to focus on maximum flavor and minimum cleanup, ensuring that your kitchen works for you, rather than becoming another item on your endless to-do list. Let’s get to work.

Table of Contents

The One-Pan Chickpea Roast

The One-Pan Chickpea Roast on baking sheet.

Most people overcomplicate dinner by thinking they need a dozen different pots and pans. I don’t have time for that, and neither do you. Throw a can of rinsed chickpeas, some chopped bell peppers, and red onion onto a single baking sheet. Drizzle with olive oil, add smoked paprika, and let the oven do the heavy lifting for about twenty minutes.

Pesto Pasta with Frozen Peas

Quick Pesto Pasta with Frozen Peas.

When I’m deep in the middle of a consulting project, I need food that takes less than ten minutes to prepare. This is my go-to. Boil your favorite pasta shape, and in the last two minutes of cooking, toss a handful of frozen peas directly into the boiling water. Drain it all together, then stir in a high-quality store-bought pesto.

Black Bean Quesadillas

Crispy Black Bean Quesadillas with melted cheese.

There is a certain elegance in simplicity, and nothing beats a well-executed quesadilla. Grab some flour tortillas, spread a layer of canned black beans (drain them first, please), and add a generous amount of sharp cheddar. Fold them over and crisp them in a dry pan until the cheese is molten.

Sheet Pan Halloumi and Veggies

Halloumi is a bit of a cheat code for vegetarians. Because it has a high melting point, you can roast it just like a vegetable, and it provides a meaty texture that makes the meal feel substantial. Slice the cheese and toss it on a tray with zucchini, cherry tomatoes, and eggplant.

Red Lentil Dahl

If you want to meal prep something that actually tastes better the next day, lentils are your best friend. Red lentils cook incredibly fast compared to other legumes, meaning you aren’t standing over a stove for an hour. Sauté some garlic, ginger, and turmeric, add the lentils and a can of coconut milk, and let it simmer until soft.

Caprese Avocado Toast

Breakfast for dinner is a valid strategy when your schedule is falling apart. Toast a thick slice of sourdough, smash half an avocado on top, and layer on some fresh mozzarella slices and halved cherry tomatoes. A quick drizzle of olive oil and a crack of black pepper finishes it off.

Greek Chickpea Salad

When it’s too hot to turn on the oven, don’t fight the heat. Chop up some cucumbers, tomatoes, and olives, then toss them with a can of chickpeas and some crumbled feta cheese. Use a simple lemon and olive oil dressing to tie the whole thing together.

Mushroom and Spinach Omelet

Eggs are the ultimate tool for the efficient cook. Sauté a handful of sliced mushrooms and some spinach until they’ve wilted, then pour two or three whisked eggs directly over the top. A little bit of goat cheese or parmesan adds a layer of sophistication with almost zero extra effort.

The Philosophy of the Plate

“Eating well shouldn’t feel like a second job. If a recipe requires twenty different ingredients and an hour of prep you don’t have, it’s not a meal—it’s a logistical error. True efficiency is finding that sweet spot where nutrition meets minimal friction.”

Marcus Holloway

Cutting the Kitchen Friction

At the end of the day, these recipes aren’t about becoming a gourmet chef or following a complex culinary manifesto. They are about eliminating decision fatigue. Whether you’re leaning on the one-pan roasted chickpeas or the quick lentil stew, the goal is the same: getting high-quality nutrition into your system without turning your kitchen into a second job. By keeping your pantry stocked with these core staples, you move from a state of constant “what’s for dinner?” anxiety to a streamlined system of predictable, efficient refueling. Stop overthinking the ingredients and start focusing on the execution.

I spent years in corporate operations learning that the most successful systems are the ones that require the least amount of maintenance. Your diet should work the same way. Don’t let the pursuit of a “perfect” meal become another source of unnecessary friction in your schedule. Use these tools to automate your nutrition, reclaim your evening bandwidth, and get back to the things that actually move the needle in your life. Once you master the basics of simplicity, you’ll realize that eating well doesn’t have to be a chore—it’s just another process to optimize.

Frequently Asked Questions

How do I ensure I'm getting enough protein without constantly cooking lentils or beans?

Look, I get it. If I had to boil a pot of lentils every single evening, I’d quit eating vegetarian. The trick isn’t more cooking; it’s better sourcing. Keep high-protein staples in your pantry that require zero prep: hemp hearts, nutritional yeast, and roasted chickpeas. Keep Greek yogurt or silken tofu in the fridge for quick additions. Build your meals around these “plug-and-play” proteins so you can spend your time on things that actually matter.

Can I prep these meals in bulk on Sundays, or will they lose their texture by Wednesday?

Most of these hold up well, but let’s be pragmatic: texture is the enemy of meal prepping. Grains and hearty legumes are your best friends for Sunday prep; they actually improve as they marinate. However, if a recipe relies on crisp greens or delicate textures, prep the components separately and assemble them right before eating. Don’t sacrifice quality for convenience. Use airtight glass containers to keep things fresh and minimize the mid-week slump.

What are the essential pantry staples I need to keep on hand to make these recipes work on short notice?

To make these recipes work when you’re short on time, you need a foundation of high-utility ingredients. Don’t overcomplicate it. Keep dried lentils, chickpeas, and quinoa on hand for quick proteins. Stock up on canned tomatoes, coconut milk, and vegetable broth for instant bases. Finally, ensure your spice rack has the essentials: cumin, smoked paprika, and red pepper flakes. If you have these, you can turn a handful of vegetables into a real meal in minutes.

How do I manage the grocery budget when vegetable prices seem to fluctuate every week?

Stop chasing the market. If you try to buy what looks good on the shelf every Tuesday, you’ll lose the budget war. Instead, shop the seasonal cycles and buy frozen. Frozen vegetables are picked at peak ripeness and, more importantly, they don’t rot in your crisper drawer while you’re working late. Build your meal plan around what’s cheap and abundant right now, not what a recipe tells you to buy. Stick to the plan.

Posted on

Essential Kitchen Staples for Effortless Healthy Eating

How to stock a healthy kitchen staples.

I spent a decade watching “wellness influencers” try to sell the idea that knowing how to stock a healthy kitchen requires a $500 grocery haul of exotic superfoods and specialized powders you can’t even pronounce. It’s a racket. Most of that stuff just sits in your pantry, gathering dust and wasting the very thing we’re all trying to save: our mental bandwidth. You don’t need a boutique organic market to eat well; you need a system that works when you’re too exhausted to think.

I’m not here to give you a list of trendy ingredients that will expire by next Tuesday. Instead, I’m going to show you a minimalist framework for building a pantry that actually serves you. We’re going to focus on high-utility staples that bridge the gap between “convenient” and “nutritious” without the unnecessary friction. My goal is to help you automate your grocery logic so you can stop staring blankly at the fridge and finally get on with your day.

Table of Contents

Building Your Foundation With Nutritious Pantry Staples

Building Your Foundation With Nutritious Pantry Staples

Building your foundation doesn’t require a culinary degree or a massive budget; it requires a system. I like to think of my pantry as a toolkit. If you walk into a kitchen and only find pasta sauce and white rice, you aren’t cooking; you’re just managing hunger. To actually build meals, you need nutrient dense ingredients that have a long shelf life and minimal preparation time. I always start with the heavy hitters: dried lentils, quinoa, canned chickpeas, and high-quality olive oil. These are the building blocks that allow you to throw together a decent meal in ten minutes when your workday goes sideways.

The goal here is to lean into a low processed food shopping mindset without making it a chore. When I’m stocking up, I look for items that offer maximum utility with minimum friction. Think oats for breakfast, canned sardines or tuna for quick protein, and various nuts and seeds for healthy fats. If you have these basics on hand, you’ve already won half the battle against decision fatigue. Instead of staring blankly at the fridge at 7:00 PM, you’re simply assembling the meal prepping essentials you already have sitting in your cupboard. It’s about being prepared, not being perfect.

The Low Processed Food Shopping Strategy

The Low Processed Food Shopping Strategy.

The biggest mistake I see people make is treating the grocery store like a scavenger hunt for convenience. They wander the middle aisles, grabbing anything with a colorful label that promises to save them twenty minutes of cooking. That’s a trap. It’s a high-friction way to eat that leaves you feeling sluggish and constantly hungry. If you want to master low processed food shopping, you have to change your perimeter strategy. Stick to the edges of the store where the actual food lives—produce, proteins, and dairy—and treat the center aisles like a minefield of unnecessary additives.

I keep a strict whole food grocery list in my notebook to prevent impulse buys. My rule is simple: if it has a label with twenty ingredients I can’t pronounce, it doesn’t go in the cart. Instead, I focus on grabbing nutrient dense ingredients that require minimal intervention. Think bags of frozen spinach, bulk quinoa, or raw nuts. These aren’t just healthy; they are high-utility tools. They reduce the mental load of deciding what to eat because they are versatile enough to be thrown into almost any meal without a second thought. Stop shopping for recipes and start shopping for building blocks.

Five Tactics to Keep Your Kitchen Functional and Frictionless

  • Shop with a “Core Five” list. Don’t wander the aisles looking for inspiration; pick five versatile ingredients every single week—like greens, a protein, a grain, a healthy fat, and a seasonal fruit—and stick to them until they become second nature.
  • Batch your prep, not just your meals. You don’t need to spend five hours on Sunday making identical Tupperware containers of chicken and broccoli. Just chop your onions, wash your kale, and boil a pot of quinoa when you have the bandwidth; it makes the actual cooking process ten times faster on a Tuesday night.
  • Master the art of the “Emergency Meal.” Keep a few high-quality, non-perishable components on hand—think canned wild salmon, jarred artichokes, or high-grade lentils—so that when your schedule falls apart, you aren’t defaulting to expensive, salty takeout.
  • Audit your inventory before you leave the house. I keep a small section in my notebook for “current stock.” There is nothing more wasteful than buying a third jar of cumin or a fourth bag of rice because you forgot what was already sitting in the back of the cupboard.
  • Use frozen produce as a strategic tool. Realistically, fresh spinach goes bad before most busy people can use it. Keep frozen berries and vegetables in the freezer; they are nutritionally dense, won’t rot in your crisper drawer, and provide an instant solution when you’re too tired to chop anything fresh.

The Philosophy of the Pantry

“A well-stocked kitchen isn’t about having every gourmet ingredient on the shelf; it’s about having the right building blocks so that when life gets chaotic, you aren’t forced to trade your health for convenience.”

Marcus Holloway

The Bottom Line

Healthy kitchen staples: The Bottom Line.

At the end of the day, stocking a healthy kitchen isn’t about achieving culinary perfection or following a rigid, complicated regimen. It’s about building a reliable system of pantry staples and low-processed goods that work for you, not against you. By focusing on high-utility ingredients and a streamlined shopping strategy, you’re essentially removing the decision fatigue that usually leads to poor choices when you’re tired or rushed. You’ve laid the groundwork; now, it’s just about maintaining that foundation so your kitchen becomes a tool for efficiency rather than another source of household friction.

Don’t feel like you have to overhaul your entire life by next Monday. Start small, grab a few more essentials on your next trip, and let the momentum build. The goal here isn’t to become a gourmet chef; it’s to reclaim your mental bandwidth so you aren’t constantly negotiating with yourself about what to eat. Once the basics are automated, you’ll find you have more energy for the things that actually matter—whether that’s your career, your family, or finally getting around to that project in the garage. Get the system running, then get on with your life.

Frequently Asked Questions

How do I keep these staples fresh without spending all my time managing expiration dates?

Stop treating your pantry like a museum. You don’t need a complex tracking system; you just need a “First In, First Out” (FIFO) rule. When you bring home new supplies, shove the old ones to the front. It’s basic logistics, but it works. I also keep a small section of my pantry for “short-term” items—things like nuts or oils that go rancid faster. If it’s in the back, it’s forgotten. Keep it simple.

Is it actually cost-effective to buy in bulk, or am I just tying up cash in food I won't use?

It’s a classic trade-off: liquidity versus unit price. If you’re buying bulk on impulse, you’re just burying cash in a pantry graveyard. That’s bad operations. However, if you apply the rule of predictable consumption to non-perishables—think grains, beans, or olive oil—it’s a win. Buy in bulk only when the math makes sense and the shelf life exceeds your usage rate. Don’t let a “deal” become dead capital sitting in your cupboard.

What's the quickest way to turn these basic ingredients into a real meal when I'm exhausted after work?

When you’re running on empty, don’t aim for a culinary masterpiece. Aim for assembly. Grab a tin of chickpeas, a bag of pre-washed spinach, and some canned tuna. Toss them in a bowl with olive oil, lemon, and whatever dried herbs you have on hand. It takes three minutes, requires zero actual cooking, and keeps you from hitting the takeout apps. Low friction, high utility. Eat, then get some rest.

How do I balance a "minimalist" pantry with the need for variety so I don't get bored of eating the same five things?

The secret isn’t having more ingredients; it’s having more modular ones. Think of your pantry like a modular synthesizer: a few core components that can be reconfigured into infinite patches. Keep your staples—grains, beans, oils—consistent, but rotate your “accent” ingredients. One week, it’s cumin and lime; the next, it’s smoked paprika and garlic. You aren’t changing the foundation; you’re just changing the flavor profile. Variety comes from spices, not clutter.

Posted on

Low-effort Sheet-pan Dinners for Busy Evenings

Easy simple sheet pan dinners for evenings.

I spent two decades in corporate operations, and if there is one thing I learned, it’s that most people treat their evenings like a second job they never applied for. You come home exhausted, stare at a kitchen full of potential chaos, and end up settling for takeout because the mental overhead of cooking feels too high. We need to stop treating meal prep like a complex logistical nightmare and start viewing it as a system to be optimized. Using simple sheet pan dinners is the most effective way to eliminate that friction; it’s about reducing the variables so you can actually reclaim your evening without sacrificing a decent meal.

In this guide, I’m stripping away the culinary fluff to give you eight high-utility combinations that actually work. I’ve curated these specific setups to ensure you get maximum flavor with minimal cleanup, focusing on ingredients that play well together under heat. By the end of this list, you’ll have a repeatable framework for automating your nutrition. We aren’t looking for gourmet complexity here; we are looking for reliable efficiency that lets you get off the clock and back to what matters.

Table of Contents

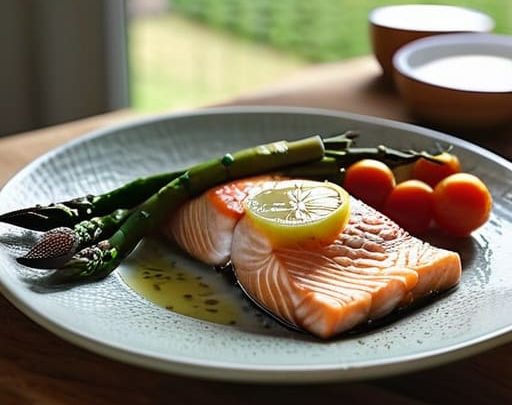
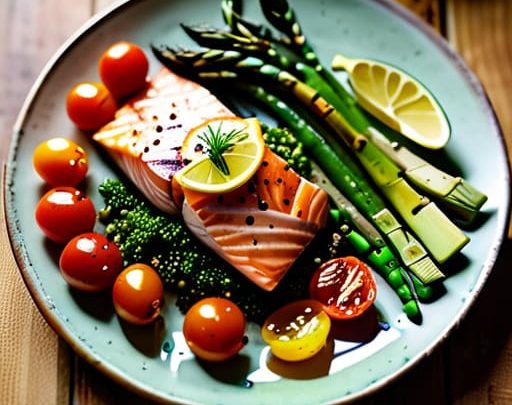
Lemon-Garlic Salmon and Asparagus

Sheet pan Lemon-Garlic Salmon and Asparagus.

When I’m deep in a consulting project, the last thing I want to do is manage four different pots on a stove. This is my go-to for a high-protein reset that requires almost zero mental overhead. You just lay the fillets and the stalks on a single tray, drizzle with olive oil, and let the oven do the heavy lifting.

Sausage, Peppers, and Onions

One-pan Sausage, Peppers, and Onions meal.

This is the ultimate “set it and forget it” meal for when you have a long evening of reading or tinkering with my synthesizers. I use high-quality Italian sausages—the kind that actually have flavor—and slice them into thick coins. Toss them in with bell peppers and red onions, and you’ve got a one-pan powerhouse that fills the house with a decent aroma.

Balsamic Chicken Thighs and Root Vegetables

Balsamic Chicken Thighs and Root Vegetables dish.

I’ve learned through years of managing complex operations that consistency is better than perfection. Chicken thighs are much more forgiving than breasts; they won’t turn into dry sawdust if you get distracted by a phone call. Pair them with halved Brussels sprouts and chopped sweet potatoes for a nutrient-dense fuel source that keeps you steady.

Mediterranean Shrimp and Zucchini

If you need something lighter that won’t leave you feeling sluggish for your evening deep-work session, this is the move. Shrimp cooks incredibly fast—usually under ten minutes—so you want to time this with your vegetables. I like to toss them with feta cheese and kalamata olives for a hit of salty, Mediterranean utility.

Beef and Broccoli Stir-Fry (Sheet Pan Style)

I know, I know—usually, stir-fry is a high-activity, wok-heavy process. But if you want to reclaim your time, you can cheat. Slice some flank steak thin and toss it on a tray with broccoli florets and a heavy dose of ginger and soy sauce. It’s a drastic simplification of a classic, but it works remarkably well.

Roasted Kielbasa and Cabbage Wedges

There is a certain pragmatic satisfaction in cooking ingredients that are basically indestructible. Cabbage wedges, when roasted, transform from a boring salad base into something sweet and crispy on the edges. Pair them with sliced kielbasa, and you have a meal that is virtually impossible to mess up.

Pesto Caprese Chicken

Sometimes you want something that feels a bit more indulgent without the actual effort of a multi-course meal. Take chicken breasts, spread a thick layer of high-quality pesto over them, and top with slices of fresh mozzarella and cherry tomatoes. It’s a flavor-dense strategy that relies on the quality of the ingredients rather than your technical skill.

Crispy Tofu and Cauliflower

For the days when I want to lean into a lighter, plant-based option, this is my standard operating procedure. The secret to avoiding “mushy” tofu is to press the water out first and toss it in a bit of cornstarch before roasting. It gives you that essential crunch that makes the meal feel substantial.

The Efficiency of One Pan

“Cooking shouldn’t feel like a second job. If a meal requires more than one pan and an hour of scrubbing, it’s not a dinner—it’s a logistical failure. A good sheet pan meal is about reclaiming your evening by automating the cleanup before you even sit down to eat.”

Marcus Holloway

Cut the Friction, Keep the Flavor

At the end of the day, these recipes aren’t about becoming a gourmet chef; they are about operational efficiency in your own kitchen. By leaning on high-heat roasting and single-pan logistics, you’ve effectively eliminated the most draining parts of your evening: the mountain of dishes and the decision fatigue that comes with a hungry household. Whether you’re opting for the classic salmon and asparagus or the heavier roasted root vegetables, the goal remains the same: minimizing the overhead of meal prep so you can actually enjoy the food you’re eating.

I spent years thinking that “doing more” meant more complexity, more steps, and more tools. I was wrong. Real mastery is knowing when to simplify. Use these sheet pan methods to automate your nutrition, reclaim your post-work hours, and stop letting the kitchen become a second job. Once you’ve cleared the mental clutter of “what’s for dinner,” you’ll find you have much more room to focus on the things that actually matter. Now, get off the screen, go prep something, and go enjoy your night.

Frequently Asked Questions

How do I prevent some ingredients from turning to mush while others are still raw?

The mistake most people make is treating the pan like a race where everyone starts at the same time. They don’t. If you’re throwing delicate asparagus in with thick-cut chicken thighs, you’re asking for mush.

Can I prep these pans a day in advance, or will the vegetables get soggy?

You can definitely prep them a day ahead, but don’t mix everything in one bag. If you toss pre-cut vegetables with salt too early, they’ll weep moisture and turn into a soggy mess. My rule: chop your veggies and proteins, store them in airtight containers, but wait to add the oil, salt, and seasonings until right before they hit the oven. That keeps the texture sharp and the prep efficient.

What’s the best way to clean the pan without spending twenty minutes scrubbing?

Don’t reach for the steel wool yet. The moment you plate your food, while the pan is still warm, hit it with some hot water and a generous amount of dish soap. If things are really stuck, dump in some water and a splash of vinegar, bring it to a simmer on the stove for five minutes, and let the heat do the heavy lifting. Scrape the residue, rinse, and get back to your evening.

Do I need to buy specific heavy-duty pans, or will any standard baking sheet work?

Don’t overcomplicate this. You don’t need a specialized kit to get started. Any standard rimmed baking sheet will do the job. If you’re looking to upgrade later, I’d suggest investing in a heavy-gauge aluminum pan—they distribute heat more evenly and won’t warp in a hot oven. But for now? Use what you have in the cupboard. The goal is to reduce friction, not add a shopping trip to your to-do list.

Posted on

Lunchtime Upgrades: Better Alternatives to Sad Desk Salads

Healthy quick lunch ideas for work.

I’ve spent most of my career sitting in glass-walled conference rooms, watching talented people burn through their mental energy by mid-afternoon. The culprit usually isn’t the workload; it’s the decision fatigue that sets in when you realize you have nothing prepared for midday. We treat lunch like an afterthought, a chaotic scramble between meetings that leaves us either starving or slumped over a pile of takeout containers. If you want to maintain your focus, you need to stop treating your nutrition like a secondary crisis and start looking for quick lunch ideas that actually serve your schedule rather than sabotaging it.

In this guide, I’m stripping away the culinary fluff to give you eight high-utility options. These aren’t elaborate recipes that require a culinary degree or an hour of prep; they are streamlined systems designed for maximum efficiency and minimal cleanup. I’ll show you how to assemble nutritious, satisfying meals in minutes so you can reclaim your break and get back to the work that actually matters. Let’s cut the noise and get to the utility.

Table of Contents

The Adult Lunchable

Charcuterie snack platter, The Adult Lunchable.

I call this the “no-cook contingency plan.” It’s essentially a curated selection of high-quality charcuterie, but without the pretension of a fancy board. Grab some sharp cheddar, a handful of almonds, some sliced deli turkey, and a few whole-grain crackers. It requires zero heat and almost zero cleanup, which is exactly what you need when your morning meetings run over.

The Mason Jar Salad

Layered ingredients in The Mason Jar Salad.

Most people hate salads because they end up as a soggy, wilted mess by noon. If you want to do this right, you have to respect the layering logic. Put your heavy dressings and hearty vegetables—think chickpeas, cucumbers, or carrots—at the very bottom. Your greens go at the very top, far away from the moisture, so they stay crisp and fresh until you’re ready to shake it all up.

The Five-Minute Grain Bowl

Quickly prepare The Five-Minute Grain Bowl.

You don’t need to be a chef to master the grain bowl; you just need to be a smart shopper. I keep a stash of pre-cooked, vacuum-sealed quinoa or brown rice in my pantry. Toss a pouch into a bowl, add a handful of baby spinach, some canned black beans, and a dollop of store-bought salsa. It’s minimalist fuel at its finest.

High-Protein Avocado Toast

Let’s be honest: toast is a bit of a cliché, but it works because it’s incredibly efficient. To turn this from a breakfast item into a legitimate lunch, you need to increase the protein profile. Top your sourdough with mashed avocado, but then add a hard-boiled egg or a layer of smoked salmon to give it some substance.

The Mediterranean Wrap

Wraps are the ultimate portable meal for anyone who isn’t tethered to a desk. Use a large whole-wheat tortilla and spread a thick layer of hummus across the surface—this acts as your structural adhesive. Pile on some feta cheese, sliced olives, and pre-washed arugula, then roll it up tight.

Rotisserie Chicken Shortcuts

If you want to eat like a person who actually has time to live, buy a rotisserie chicken every Sunday. It is the most cost-effective hack in the grocery store. Shred the meat while it’s still warm and divide it into containers for the week. You now have a high-quality protein base for almost any quick meal.

The Tuna and White Bean Mash

This is my go-to when I need something that feels “real” but requires no stove or microwave. Mix a can of tuna with a can of rinsed cannellini beans, a splash of olive oil, and some dried oregano. The beans add the complex carbohydrates and fiber that tuna alone lacks, making it a much more stable energy source.

Overnight Oats (The Savory Pivot)

We usually think of oats as a sweet breakfast, but if you’re looking for a quick lunch, the savory route is a game-changer. Prepare your oats with water or broth instead of milk, and skip the cinnamon and honey. Instead, stir in some nutritional yeast, salt, and pepper.

The Cost of Decision Fatigue

“A lunch break shouldn’t be another project on your to-do list. If you’re spending twenty minutes deciding what to eat, you’ve already lost the afternoon. Build a system for your midday meal so your brain can stay focused on the work that actually moves the needle.”

Marcus Holloway

The Bottom Line

At the end of the day, these eight options aren’t about becoming a gourmet chef; they are about eliminating decision fatigue. Whether you’re leaning on the assembly-line simplicity of a grain bowl or the zero-prep utility of a high-quality deli wrap, the goal remains the same: fuel your body without draining your mental battery. By standardizing your midday meal, you stop treating lunch like a problem to be solved and start treating it as a functional reset. Stop letting the question of “what should I eat?” hijack your focus during your most productive hours.

I spent years in the corporate grind watching people burn out because they couldn’t manage the small, friction-filled moments of their day. We often think we need massive lifestyle overhauls to find balance, but real efficiency is found in these small, automated wins. Use these ideas to build a repeatable system that works for you. Once you reclaim that hour from the chaos of meal planning and cleanup, you’ll realize that time is the only currency that actually matters. Now, go get back to what you were actually supposed to be doing.

Frequently Asked Questions

How do I keep these meals from getting soggy if I'm prepping them a day or two in advance?

The secret is structural separation. Never let your dressings or wet ingredients touch your base until you’re ready to eat. I use small, reusable containers for vinaigrettes or sauces and keep them separate from greens or grains. If you’re prepping salads, put the heavy, moisture-resistant items like chickpeas or cucumbers at the bottom and the delicate leaves at the top. It’s a small adjustment that eliminates the mush and saves your lunch.

What’s the most efficient way to shop for these ingredients without spending my entire Sunday in the grocery aisles?

Stop treating grocery shopping like a weekend hobby. If you want your Sunday back, use a digital list app and shop by aisle, not by item. Better yet, batch your orders. Pick one day a week, use a single online grocery service to grab everything on your list, and have it delivered. It costs a few extra dollars, but you’re buying back your time. That’s the real ROI.

Can I adapt these ideas for a limited setup, like if I only have access to a microwave and a kettle at my desk?

Absolutely. In fact, I prefer it. Constraints breed efficiency. If you’re limited to a kettle and a microwave, stop looking for recipes and start looking for components. Think couscous or instant oats for the kettle; pre-cooked grains or frozen veggie medleys for the microwave. It’s about assembly, not cooking. You aren’t running a bistro; you’re fueling a machine. Keep the footprint small, the cleanup zero, and the utility high.

How do I balance these quick options with actual nutritional value so I don't crash by 3:00 PM?

The 3:00 PM crash is almost always a glucose spike followed by a hard landing. To avoid it, stop treating “quick” as an excuse for “empty.” Every meal needs a structural foundation: protein, healthy fats, and fiber. If you’re grabbing a wrap, ensure there’s actual chicken or chickpeas inside, not just flour and sauce. Think of food as fuel for your cognitive bandwidth. If it lacks substance, it’s just a distraction.

Posted on

A Beginner’s Guide to Cooking Fish Without the Stress

Beginner guide on how to cook fish.

I spent most of my twenties in corporate boardrooms where “fine dining” often meant paying a 300% markup for a tiny piece of salmon that was overcooked into something resembling a dry sponge. Most people treat a trip to the seafood counter like a high-stakes gamble, terrified that they’ll ruin an expensive fillet by following some convoluted, five-star recipe that requires tools they don’t own. Honestly, the internet has made learning how to cook fish feel like a technical manual for a jet engine, when it really shouldn’t be that difficult.

I’m not here to give you a lecture on molecular gastronomy or tell you that you need a sous-vide machine to eat well. My goal is to strip away the noise and give you a functional framework that works every single time. I’m going to show you how to master heat, timing, and seasoning so you can stop stressing about the kitchen and start enjoying your dinner. We’re going to focus on high-utility methods that respect your time and your palate, cutting straight to the results.

Table of Contents

The Best Way to Season Fish for Maximum Flavor

The Best Way to Season Fish for Maximum Flavor

The mistake I see most often is people treating a piece of fish like a heavy steak. You don’t need a dry rub that looks like it belongs on a brisket. When it comes to the best way to season fish, simplicity isn’t just a preference; it’s a necessity to avoid masking the delicate flavor of the protein. Start with the basics: high-quality kosher salt and freshly cracked black pepper. If you’re working with something mild like cod or halibut, a squeeze of lemon and a touch of dried herbs is plenty. If you’re tackling something richer, like salmon, don’t be afraid to lean into acidity or even a bit of garlic butter.

The real trick, however, is timing. If you salt your fillet too early and let it sit, the salt will draw out moisture, leaving you with a texture that’s more “rubbery” than “flaky.” I prefer to season my fish immediately before it hits the heat. This preserves the integrity of the flesh and ensures you aren’t fighting against a soggy surface. Keep your spice rack lean and your focus sharp. You aren’t looking for a culinary spectacle; you’re looking for a meal that tastes like the ocean, not a spice cabinet.

Choosing the Right Types of Fish for Beginners

Choosing the Right Types of Fish for Beginners

If you’re just starting out, don’t walk into the seafood aisle and feel pressured to buy something exotic or expensive. Most people fail because they pick a finicky, high-maintenance species that demands perfect timing and professional technique. For a beginner, I recommend sticking to the types of fish for beginners that are forgiving: salmon, tilapia, or cod. Salmon is my go-to because its higher fat content makes it almost impossible to dry out, while white fish like cod or halibut are excellent canvases for whatever flavors you’re experimenting with.

The goal here is to minimize friction. If you choose a delicate fillet, you’ll spend the whole time worrying about it breaking apart in the pan. Instead, look for something with a bit of structure. When you’re browsing, aim for fillets that look firm and smell like the ocean—not like anything sitting in a container for too long. Mastering a few reliable staples is the most efficient way to build confidence. Once you can handle a piece of salmon without stress, you’ll have the foundation needed for more complex healthy seafood preparation tips and more advanced culinary projects.

Five Rules to Keep Your Fish from Becoming a Disaster

  • Dry the skin thoroughly. I don’t care how much paper towel you use; if that surface is damp, you’re steaming the fish instead of searing it. Pat it down until it’s bone-dry to ensure you actually get that crispy texture.
  • Stop using a timer. Fish is too temperamental for a rigid schedule. Use your eyes and a fork instead. The moment the flesh turns opaque and flakes easily under light pressure, pull it off the heat. Overcooking is the fastest way to turn a premium fillet into something resembling rubber.
  • Get the pan hot before the fish touches it. If you drop cold fish into a lukewarm pan, you’re just inviting it to stick. Wait for the oil to shimmer—or even just barely smoke—before you lay it down.
  • Don’t touch it. Once the fish hits the pan, leave it alone. I know it’s tempting to poke at it to see if it’s cooking, but you’ll only break the delicate structure. Let the heat do the work and wait for it to naturally release from the pan.
  • Invest in a decent thermometer, but use it sparingly. If you do use one, aim for the thickest part of the fillet and pull it off the heat a few degrees early. Residual heat will finish the job while it rests on your plate.

The Philosophy of the Pan

Cooking fish isn’t about mastering a complex recipe; it’s about managing heat and knowing when to walk away. If you respect the ingredient and stop fighting the clock, you’ll stop serving rubbery, overdone mistakes.

Marcus Holloway

Cutting Through the Complexity

Cutting Through the Complexity of cooking fish.

At the end of the day, cooking fish doesn’t require a culinary degree or a kitchen full of specialized gadgets. It comes down to three fundamental pillars: picking a high-quality fillet, seasoning it with purpose rather than excess, and respecting the heat. If you can master the art of not overcooking the protein and choosing the right fat for your pan, you’ve already won half the battle. Stop worrying about the fancy techniques you see on television and focus on the utility of simplicity. Keep your pantry stocked with the basics, keep your pans hot, and don’t let the fear of a ruined meal keep you from the stove.

I’ve spent a lot of my career looking for ways to optimize systems, and I’ve realized that the best systems are often the simplest ones. Cooking shouldn’t be another source of friction in your day; it should be a way to refuel and reset. Once you strip away the unnecessary noise, you’ll find that preparing a decent meal is actually quite intuitive. My advice? Get in there, make a few mistakes, and learn the rhythm of the kitchen. Eventually, you won’t even need a recipe—you’ll just know. Now, put down the phone, grab a pan, and get to work.

Frequently Asked Questions

How do I know if the fish is actually done without overcooking it?

Stop guessing and stop hovering over the stove. The most reliable way to tell if your fish is done is with a digital meat thermometer. Aim for an internal temperature of 145°F (63°C), but pull it off the heat a few degrees early; carryover cooking will do the rest. If you don’t have a thermometer, use a fork to gently flake the thickest part. If it separates easily and looks opaque, it’s ready.

Is it worth the extra cost to buy frozen fish instead of fresh?

Don’t fall for the “fresh is always better” myth. It’s a marketing trap that costs you time and money. Most “fresh” fish at the grocery store has actually been sitting in transit for days. High-quality frozen fillets are often flash-frozen at sea, locking in nutrients and flavor better than anything sitting under a grocery store light. If you want to save money and reduce waste, buy frozen. Just thaw it properly.

What are the best tools I actually need in my kitchen, or can I get by with a basic pan?

You don’t need a drawer full of specialized gadgets. In fact, most of them are just friction in disguise. If you’re starting out, skip the fancy electric fillets and high-tech thermometers. You need one reliable heavy-bottomed skillet—cast iron or stainless steel is best for heat retention—and a flexible fish spatula to prevent tearing. That’s it. Master the heat control on a single good pan, and you’ve already won half the battle.

How do I stop my kitchen from smelling like a seafood market for the next three days?

The smell lingers because you’re treating the symptom, not the cause. First, clear the trash immediately; don’t let fish scraps sit in the bin overnight. Next, scrub your prep surfaces with a vinegar solution or lemon juice to neutralize the oils. For the air itself, skip the heavy candles. Simmer a small pot of water with lemon slices and rosemary on the stove. It’s simple, effective, and gets rid of the funk without the chemical headache.

Posted on

Authentic Pasta Techniques to Cook Like an Italian

Learn how to cook pasta perfectly.

I spent fifteen years in corporate operations, where I learned that most “complex” systems are just layers of unnecessary friction masking a simple core. Cooking is no different. I see people wasting twenty minutes reading artisanal blogs about “hand-stretched semolina hydration” or buying $40 specialty salts, when they still end up with a gummy, overcooked mess on their plate. If you’re looking for a way to learn how to cook pasta perfectly without turning your kitchen into a chemistry lab or your wallet into a donation bin, you’re in the right place. Most of the “expert” advice out there is just fluff designed to sell you more gear.

I’m not here to give you a culinary lecture; I’m here to give you a workflow. My goal is to strip away the pretension and give you a reliable, repeatable process that works every single time you boil water. I’ll show you the exact variables that actually matter—from water salinity to the critical timing of the “al dente” window—so you can stop overthinking your dinner and get back to your life. Let’s get to the utility.

Table of Contents

Mastering the Art of Boiling Water for Pasta

Mastering the Art of Boiling Water for Pasta.

Most people treat boiling water like an afterthought, waiting for the pot to bubble while they stand around aimlessly. That’s a mistake. If you want efficiency, you need to start with a large pot and a high-output burner. Don’t crowd the vessel; pasta needs room to move, or you’ll end up with a gummy, starchy mess. I always keep my kettle on standby to jumpstart the process. It’s a small bit of kitchen automation that saves five minutes of staring at a stovetop.

Once you hit a rolling boil, it’s time to address the salting pasta water importance. I don’t care what the “gourmet” blogs say—you need enough salt to make the water taste like the sea. This isn’t just for flavor; it’s the only chance you have to season the dough from the inside out.

Finally, keep a close eye on the clock. The difference between al dente and soft pasta is often a matter of sixty seconds. I always pull my noodles out a minute before the package instructions suggest. Why? Because you’ll likely finish the dish by using pasta water in sauces later. That starchy liquid is liquid gold for emulsifying your sauce, and it’s better to undercook the pasta slightly than to serve a mushy plate of wasted effort.

Why Salting Pasta Water Importance Cant Be Ignored

Why Salting Pasta Water Importance Cant Be Ignored

Most people treat salt as an afterthought, something to sprinkle on the plate at the end. That’s a mistake. If you want to get this right, you need to understand the salting pasta water importance from a structural level. You aren’t just seasoning the surface; you are seasoning the dough from the inside out as it hydrates. Without enough salt in that pot, your pasta will taste flat and one-dimensional, no matter how expensive your sauce is. I’ve seen too many people rely on heavy sauces to fix a bland noodle, but that’s just masking a fundamental failure in the process.

Think of the water as a delivery system. You want the water to taste like the sea—not literally, of course, but it should have a distinct, briny presence. This is the only chance you have to infuse flavor directly into the starch. Beyond taste, this step is crucial when you start using pasta water in sauces later on. That starchy, salty liquid is liquid gold; it acts as an emulsifier that binds your sauce to the noodle. If your water was under-salted, your final dish will lack that cohesive, professional finish that separates a home meal from a restaurant-quality experience. Get the salt right early, and the rest of the work becomes significantly easier.

Five Rules to Stop Ruining Your Dinner

  • Stop draining the whole pot into the sink. Reserve at least a cup of that starchy, salty pasta water before you do anything else. It’s liquid gold for emulsifying your sauce and making it actually stick to the noodles instead of sliding off into a puddle at the bottom of the bowl.
  • Don’t trust the box instructions blindly. Manufacturers write those times for a generic setting, but your stove and pot are unique. Start tasting your pasta two minutes before the timer is supposed to go off. You’re looking for that “al dente” bite—firm to the tooth, not mushy.
  • Ditch the oil. I see people adding olive oil to the boiling water to “prevent sticking,” but all you’re doing is coating the pasta in a greasy film that prevents the sauce from adhering. If you use enough water and keep it at a rolling boil, they won’t stick.
  • Finish the pasta in the pan, not the bowl. Once the pasta is nearly done, move it directly from the water into your sauce. Let it simmer in the sauce for the last minute of cooking. This allows the pasta to absorb the flavor rather than just being a vehicle for it.
  • Use a large enough pot. If you crowd the pasta, the temperature drops too sharply when you add it, and the starch buildup turns the water into a thick, gummy mess. Give your noodles room to breathe and move freely.

## The Philosophy of the Process

“Cooking pasta isn’t about following a recipe to the letter; it’s about managing the variables. If you control the heat, the salt, and the timing, you stop guessing and start executing. Precision saves you from a mediocre meal and, more importantly, saves you from having to cook it twice.”

Marcus Holloway

Final Thoughts on the Perfect Plate

Final Thoughts on the Perfect Plate pasta.

At the end of the day, cooking great pasta isn’t about complex techniques or expensive gadgets; it’s about respecting the process. You’ve learned that waiting for a hard boil saves you from a gummy mess, and that heavy salting is your only real chance to season the noodle from the inside out. When you combine those basics with the habit of reserving a splash of that starchy pasta water, you move from merely boiling noodles to actually building a sauce. It’s about eliminating the friction between a hungry evening and a high-quality meal by mastering these small, repeatable wins.

My philosophy has always been that we should automate the mundane so we can enjoy the meaningful. Cooking shouldn’t be a source of stress or a chaotic kitchen experiment; it should be a reliable, efficient system that rewards you with something delicious every single time. Once you stop guessing and start following these structured steps, you reclaim your evening and your sanity. Now, stop reading, get that water boiling, and go enjoy a meal that actually tastes like it was worth the effort.

Frequently Asked Questions

When exactly should I start tasting the pasta to avoid overcooking it?

Don’t wait until the timer goes off to check your progress. Start tasting the pasta about two minutes before the package instructions say it’ll be done. You’re looking for that “al dente” bite—firm to the tooth, but without any raw, chalky center. It’s a moving target, so treat it like any other process: constant, incremental testing is the only way to avoid a pot of mush.

Should I actually use oil in the water to keep the noodles from sticking, or is that a waste of time?

Skip the oil. It’s a common misconception that adds zero value and actually makes your life harder. Oil creates a slick film around the noodles, which prevents the sauce from clinging to the pasta later. You’ll end up with a greasy, bland mess. If you’re worried about sticking, just use more water and stir more frequently during the first two minutes. It’s simpler, cleaner, and much more effective.

Is it worth saving some of that starchy pasta water, or should I just drain it all away?

Don’t dump it all down the drain. That starchy liquid is liquid gold. I always scoop out a small mug of it before I drain the pot. When you toss your pasta with sauce, add a splash of that water. It acts as an emulsifier, binding the fats and liquids together to create a silky texture that clings to the noodles instead of pooling at the bottom of the bowl. It’s a simple way to upgrade your meal with zero extra effort.

What's the best way to handle the pasta if I'm not eating it the second it leaves the pot?

If you aren’t eating immediately, don’t let the pasta sit in a colander; it’ll turn into a gummy, starchy mess. My rule: drain it, toss it with a splash of olive oil to prevent sticking, and spread it on a baking sheet to cool. If you’re prepping for later, store it in the fridge. When you’re ready to eat, reheat it with a bit of pasta water to restore that silky texture.

Posted on

Better Than Takeout: the Secret to Homemade Pizza

Learn how to make homemade pizza.

Most people think you need a $1,500 wood-fired oven and a degree in fermentation science to master the art of the crust. They spend weekends chasing complex sourdough starters only to end up with a dense, cracker-like mess that tastes more like cardboard than dinner. I spent years falling for that exact trap, thinking that complexity equaled quality. But after a decade of streamlining processes in my professional life, I realized that learning how to make homemade pizza isn’t about adding more variables; it’s about eliminating the friction between you and a great meal.

I’m not here to give you a twenty-step recipe that requires a laboratory setup. Instead, I’m going to show you my streamlined protocol for high-quality results using standard kitchen tools. I’ll walk you through the essential gear, the minimal ingredient list you actually need, and the specific timing that prevents a kitchen disaster. My goal is to help you automate the decision-making process so you can stop stressing over the dough and start actually enjoying the process. Let’s get to work.

Table of Contents

Recipe Details

Total Time: 35 minutes
Difficulty: Medium

Ingredients

  • 2 cups all-purpose flour
  • 1 teaspoon active dry yeast
  • 3/4 cup warm water
  • 1 teaspoon salt
  • 1/2 cup tomato sauce
  • 1.5 cups shredded mozzarella cheese
  • 1/4 cup fresh basil leaves

Recipe Instructions

Step 1

Stop overthinking the dough. You don’t need a sourdough starter or a degree in fermentation to get a decent crust. Mix 500g of bread flour, 350g of warm water, 10g of salt, and 7g of instant yeast in a large bowl. Knead it until it’s smooth—about ten minutes of manual labor—then let it sit in a covered bowl for at least two hours. If you have the mental bandwidth, let it sit in the fridge overnight; the flavor profile improves significantly with time.

Step 2

Prep your workspace and get the heat up. Most home ovens are underpowered, so you need to compensate. If you own a pizza stone or a steel, put it in the oven now. Crank your oven to its absolute maximum setting and let that stone soak up the heat for at least 45 minutes. You want the surface to be punishingly hot so the dough hits a thermal shock the moment it touches the stone.

Step 3

Shape the dough without destroying the air bubbles. Resist the urge to use a rolling pin; that’s a rookie mistake that crushes the structure you worked so hard to build. Instead, use your knuckles to gently stretch the dough from the center outward on a piece of parchment paper. You’re looking for a thin middle and a slightly thicker rim for the crust.

Step 4

Keep the toppings lean. This is where most people fail by turning their pizza into a soggy, heavy mess. Spread a thin layer of crushed San Marzano tomatoes—don’t use the pre-cooked, herb-heavy stuff—and add a handful of fresh mozzarella. If you’re adding meat or heavy vegetables, less is more. Overloading the dough prevents it from crisping up, leaving you with a limp, uninspired meal.

Step 5

The bake and the finish. Slide the pizza (with the parchment, if you’re using it) onto the hot stone. Watch it like a hawk. In a high-heat oven, you’re looking at roughly 7 to 10 minutes. You want charred “leopard spots” on the crust and bubbling cheese. Once it’s out, hit it with a drizzle of high-quality olive oil and some fresh basil. Don’t wait for it to cool—eat it while the textures are still distinct.

Mastering the Best Pizza Dough Recipe and Yeast Fermentation Tips

Mastering the Best Pizza Dough Recipe and Yeast Fermentation Tips.

If you want to move from “decent” to “exceptional,” you need to stop viewing dough as a chore and start seeing it as a process. The secret isn’t a magic ingredient; it’s time. Most people rush the rise because they’re hungry, but that’s a mistake. For the best pizza dough recipe, I recommend a cold ferment in the fridge for at least 24 hours. This slow process allows the enzymes to break down starches into complex sugars, which is the real key to those impressive charred bubbles you see in professional wood-fired ovens.

When it comes to yeast dough fermentation tips, consistency is your best friend. Keep your environment stable. If your kitchen is freezing, your dough will stall; if it’s too hot, it’ll overproof and taste like beer. I always keep a small notebook by my workstation to track ambient temperature and rise times. It’s a simple bit of data that removes the guesswork.

Finally, don’t neglect the heat. Baking pizza in a home oven can be tricky because residential units rarely hit the 800°F marks of a commercial deck. To compensate, use a preheated stone or steel and maximize your top broiler during the last two minutes of the bake. This mimics that intense radiant heat needed for a proper crust.

Optimizing Homemade Pizza Sauce Ingredients and Crispy Crust Techniques

Most people overcomplicate the sauce. You don’t need a simmering pot of complex marinara that takes two hours; you just need high-quality homemade pizza sauce ingredients that respect the dough. I prefer a “no-cook” approach: crushed San Marzano tomatoes, a pinch of sea salt, a splash of olive oil, and maybe some fresh basil. By skipping the pre-cooking stage, you allow the sauce to cook in the oven alongside the crust, which prevents the dough from becoming a soggy mess. If you want a bit of heat, a few red pepper flakes go a long way, but don’t let the sauce overpower the char of the bread.

As for the base, the biggest hurdle is often baking pizza in a home oven without getting that professional-grade crunch. Standard residential ovens rarely hit the temperatures of a wood-fired brick oven, so you have to compensate. My rule of thumb is to use a preheated baking stone or steel. Let it soak up the heat for at least forty-five minutes before the first pie goes in. If you’re still struggling with a soft center, try minimizing your toppings—too much moisture from heavy cheese or watery vegetables is the fastest way to kill your crust’s integrity. Keep it lean, keep it hot, and let the heat do the heavy lifting.

Three Rules for Frictionless Pizza Nights

Three Rules for Frictionless Pizza Nights guide.
  • Stop overcomplicating the toppings. A heavy-handed approach leads to a soggy, structural nightmare. Stick to high-quality ingredients in moderation so the crust can actually do its job.
  • Pre-heat your stone or steel for at least forty-five minutes. If you try to bake on a lukewarm surface, you’re just making warm bread, not pizza. Heat is your most important ingredient.
  • Get your hands dirty with the dough. Don’t reach for a rolling pin; it kills the air bubbles you worked so hard to cultivate during fermentation. Stretch it by hand to preserve that texture.
  • Manage your moisture levels. If you’re using fresh mozzarella, slice it and let it drain on a paper towel for twenty minutes first. Otherwise, you’ll end up with a puddle in the middle of your pie.
  • Prep your station before the heat is on. Once that dough is stretched, the clock is ticking. Have your sauce, cheese, and toppings laid out in an organized flow so you aren’t scrambling while the oven is screaming.

The Philosophy of the Crust

“Stop chasing complex gourmet recipes and start mastering the fundamentals; a perfect pizza isn’t about expensive toppings, it’s about controlling the variables of heat, hydration, and time so the process works for you, not against you.”

Marcus Holloway

The Bottom Line

Mastering pizza fundamentals: The Bottom Line.

Making a great pizza isn’t about chasing professional kitchen equipment or expensive, niche ingredients. It comes down to mastering the fundamentals: a well-fermented dough, a sauce that doesn’t taste like a tin can, and a high-heat environment that creates that essential crust crunch. Once you’ve streamlined your mise en place and understood how yeast behaves in your kitchen, the process stops being a chore and starts becoming a repeatable system. Stop overthinking the variables and just focus on the quality of your core components.

At the end of the day, the goal here wasn’t just to teach you a recipe; it was to show you that you can take control of your own consumption. There is a profound sense of satisfaction in knowing exactly what went into your meal and, more importantly, knowing you didn’t have to rely on a delivery app to get it. Use these protocols to reclaim your Friday nights and simplify your routine. Now, put the phone away, grab a slice, and enjoy the results of your work.

Frequently Asked Questions

How do I manage the dough if I don't have time to bake it immediately after it rises?

Don’t let a busy schedule ruin a good dough. If you aren’t ready to bake, move the dough to the fridge. Cold fermentation is actually a win; it slows the yeast and develops a much deeper flavor profile. Just keep it in a sealed container so it doesn’t dry out. When you’re ready, pull it out about an hour before baking to let it come back to room temperature. Efficiency through patience.

My crust is coming out soggy in the middle; how do I fix the moisture issue?

Soggy centers are usually a moisture management failure. First, crank your oven as high as it goes—heat is your best friend for instant evaporation. Second, don’t overload the dough with sauce or heavy toppings; keep it lean. If you’re using fresh mozzarella, drain it thoroughly first. Finally, try pre-heating your stone or steel for at least forty-five minutes. You need that thermal mass to hit the dough hard and fast.

Can I use a standard baking sheet, or do I actually need a pizza stone to get a decent result?

Look, you don’t need a specialized pizza stone to get a solid result. If you’re trying to minimize friction in your kitchen, a standard baking sheet works just fine. My advice? Flip the sheet upside down. It creates a flatter surface that helps heat circulate more evenly. If you want to level up without the clutter, invest in a heavy cast-iron skillet. It holds heat like a pro and mimics a stone’s performance.

What’s the best way to store leftover dough without it losing its structure?

Don’t just toss the leftover dough in a plastic bag and hope for the best; that’s a recipe for a sticky, fermented mess. Lightly oil a glass container—it handles temperature changes better than plastic—and place the dough inside. Press it into a flat disc to save space and ensure even fermentation. Keep it in the fridge for up to three days. Just remember to let it hit room temperature before you try to stretch it.